Brand blog and website
Articles on WordPress or Ghost, publishing destinations and the brand's static website.
What it is for
Publish articles on the brand's blog, turn them into content for the networks and generate the brand's website.
Before you start
Have the blog's address and credentials (WordPress or Ghost).
Step by step
Write and publish articles
In Blog e site (Blog & site), click Novo artigo (New article) (or, in the Estúdio (Studio), Criar com IA (Create with AI) with the Blog network) and say the topic. The text is kept in Markdown; the caption becomes the description for Google and the first slide's image, when there is one, becomes the featured image.
In Blog e site → Destinos (Blog & site → Destinations), add the blog:
- WordPress: address, user and an application password (Users → Profile → Application Passwords).
- Ghost: address and the Admin API key (Settings → Integrations).
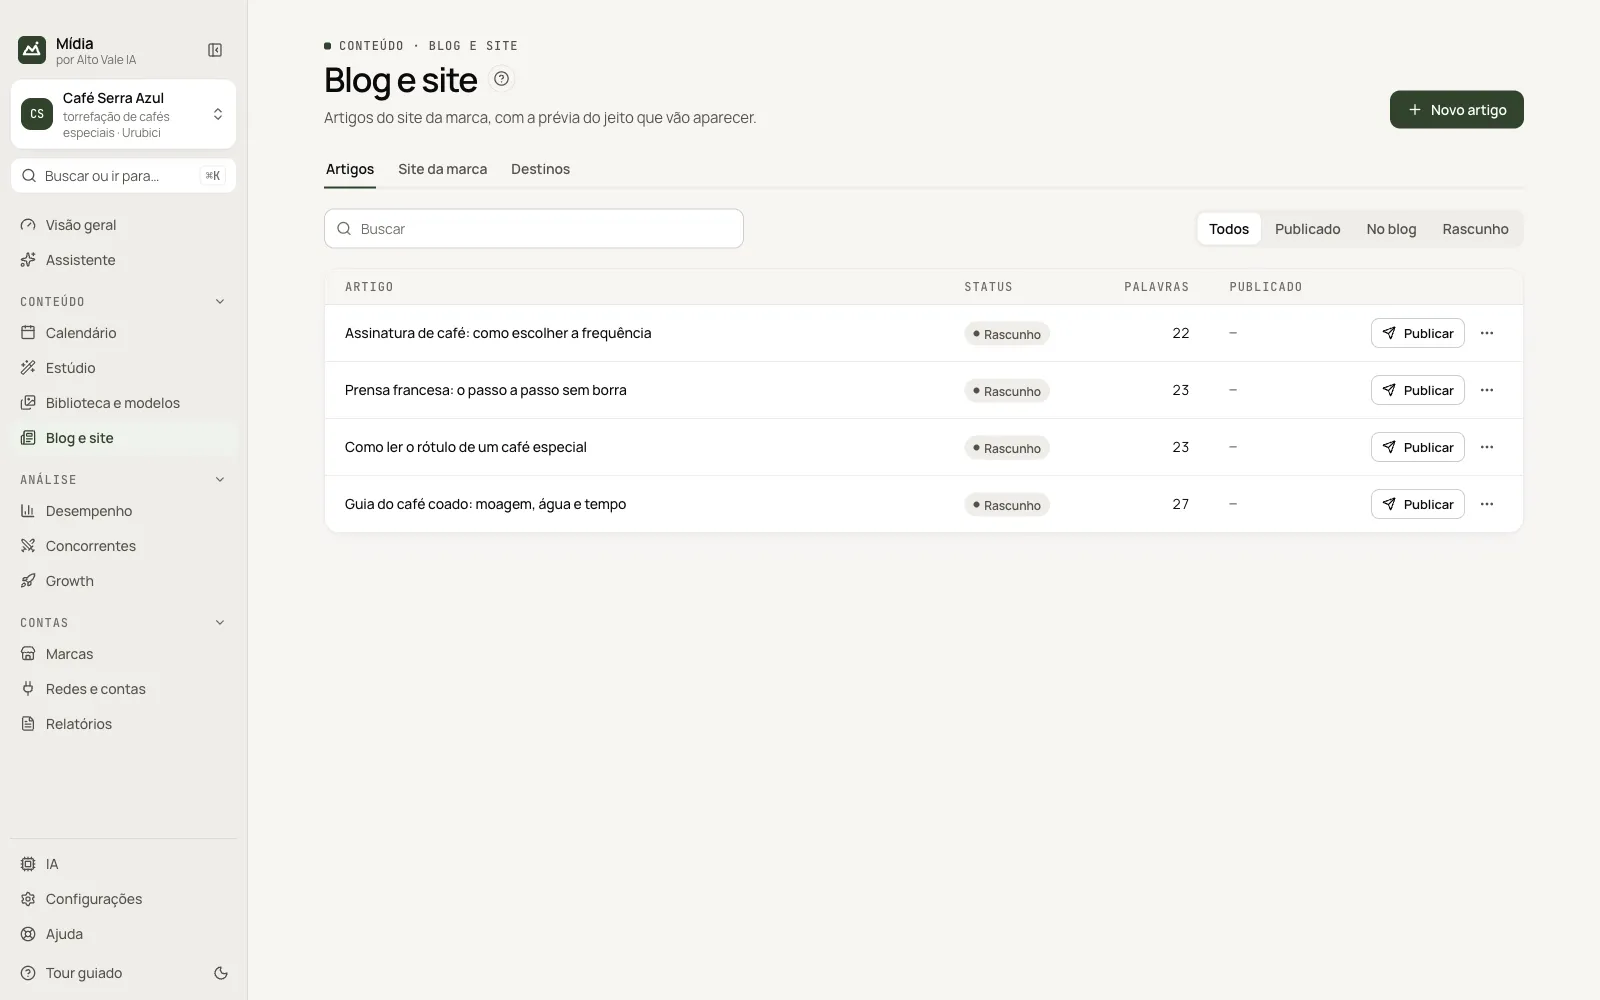
The credentials are stored encrypted only on this computer, along with the API keys. In Artigos (Articles), the table shows the status, the words and the publication date, with search and filter. Use Publicar (Publish) on the row, or Enviar rascunho ao blog (Send draft to the blog) in the ⋯, to review on the blog. Publishing again updates the same post.
The SEO title and description fields are sent under the names used by Yoast and Rank Math. On WordPress, they only take effect if the site exposes those fields; if they do not show up, fill them in in the plugin.
One article, several formats
Virar conteúdos (Turn into content, in the article's ⋯) uses the AI to create, in the Studio, a carousel, a video script and a LinkedIn post from the article, based only on what is in it.
Brand website
In Site da marca (Brand website), fill in the main headline, the button and the links. The app generates a home page, a blog, an article page for each text and a links page for the bio, with the brand's colors, fonts and logo, and without scripts. Articles with the status Pronto (Ready) or Publicado (Published) go into the blog.
- Gerar a pasta (Generate the folder) creates the files, to upload wherever you like. On Cloudflare Pages, upload that folder through their dashboard (Direct Upload).
- Netlify: create an empty site, add a destination with the Site ID and a token. The button publishes.
- GitHub Pages: create the repository, add a destination with
owner/name, branch and a token. The button makes a single commit. Enable Pages on that branch on GitHub.
Enter the public address so the website includes a sitemap, feed and canonical links.
All the actions on the screen
Novo artigo (New article)
Opens the Studio already set to article. Example: "Guia do café coado: moagem, água e tempo".
Artigos tab (Articles)
Table with status, words and publication date; search and filter. Publicar (or Atualizar, Update) sends to the blog; the "⋯" has Enviar rascunho ao blog, Virar conteúdos, Abrir o artigo (Open the article) and Copiar (Copy).
Virar conteúdos (Turn into content)
The AI creates a carousel, a video script and a LinkedIn post from the article.
Site da marca tab (Brand website)
Main headline, button, bio links and preview; Gerar a pasta creates the website files.
Destinos tab (Destinations)
Cards for the blog and the website destinations, with Testar (Test), Editar (Edit) and delete; Destino (Destination) adds another. Example: Café Serra Azul's WordPress with an application password.
Shortcuts
Right-clicking an article or destination opens the actions.
Common problems
"sem credencial" (no credential). Edit the destination and paste the application password (WordPress) or the Admin API key (Ghost).
See also
Screen in the app: /blog · In the app, press F1 on this screen to open this guide.
Still have a question?
Talk to the Alto Vale IA team on WhatsApp. Tell us the app, the screen and what happened.